If you thought the way the eye works was cool before, this is going to blow your mind. You’re about to learn about the crazy wonders of the the cyrstalline lens.
This lesson builds on all of the previous lessons in this course, so please make sure you are up to speed before tackling this one.
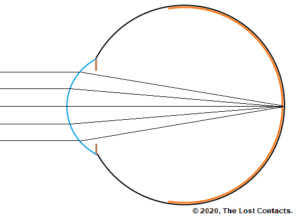
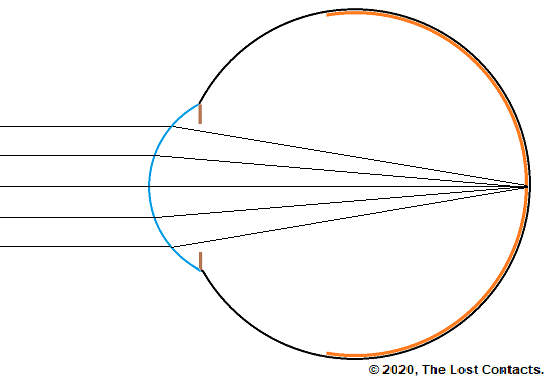
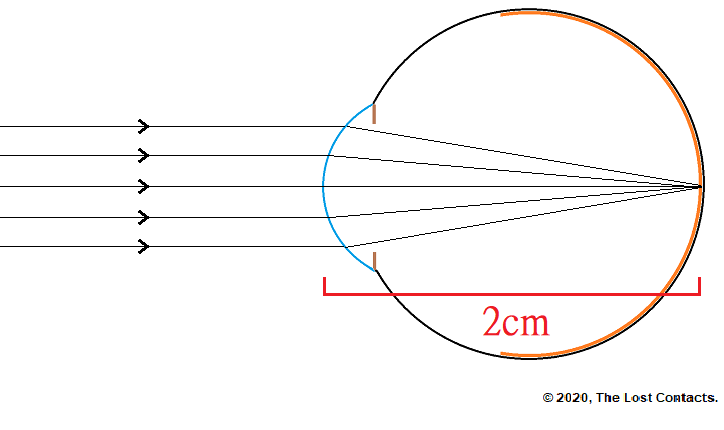
This is the ray diagram of the eye that we are familiar with now.
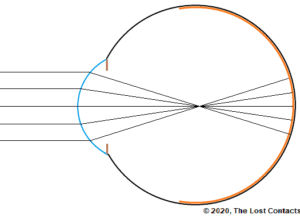
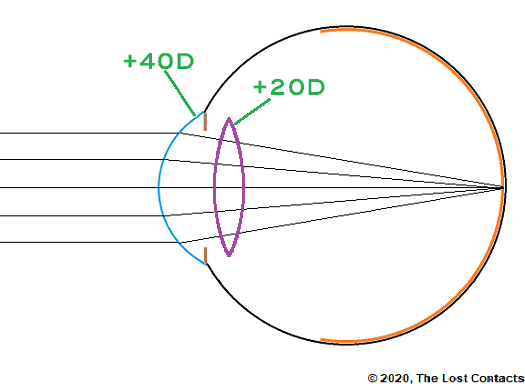
The truth is that this diagram doesn’t actually show the complete picture of how the eye focuses light. This diagram depicts the cornea as being the only lens that focuses light for the eye. In fact, there are actually two structures that act as lenses.
The cornea
The crystalline lens
Here is a diagram that depicts both the cornea and the crystalline lens.
The crystalline lens is hidden just behind the iris. You cannot see it on your own as it is transparent and it is too dark in side the eyes to see.
What is the Power of the Crystalline Lens?
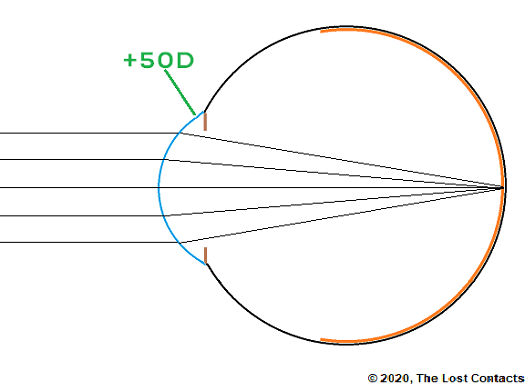
In past lessons, I have used +50D to represent the strength of the cornea.
This is not actually the case. In reality, the total power of the eye is closer to +60D. The cornea is about +40D and the crystalline lens is approximately +20D (at rest… more on this a little later on).
Here is a more accurate picture of the power of the eye. Keep in mind this is still a little simplified, but this is more than enough for you to know.
Review of Light Vergence & Distance
Before I reveal why the crystalline lens is so fascinating, we need to do a brief review of the vergence of light emitted from different distances.
Light that is emitted by objects is always divergent.
As the light travels away from the object it becomes less divergent.
Eventually, when the light has traveled more than 6 meters (20 feet), the light becomes parallel and stays that way.
This diagram illustrates these key points:
Have you noticed that whenever I have drawn a ray diagram of the eye, the incoming light has always been parallel?
Every ray diagram of the eye in this course so far has had parallel light entering the eye.
Why is that?
The answer is because we have always assumed that the eye was at least 6 meters (20 feet) away from the object producing the light.
So…
Q: What happens when the eye is closer than 6 metres (20 feet) away from the object it’s looking it?
A: The light rays entering the eye will be diverging (not parallel)
We are now going to study 3 diagrams that illustrate the effect of distance (between the object and the eye) on the vergence of light entering the eye and focal distance.
*Note: These are all emmetropic eyes i.e., not nearsighted, farsighted and no astigmatism.
This first eye is looking at an object situated over 6 meters (20 feet) away – hence the light reaching the eye is parallel.
This results in the focal point forming on the retina.
This means vision is clear
The eye looking at a distant object.
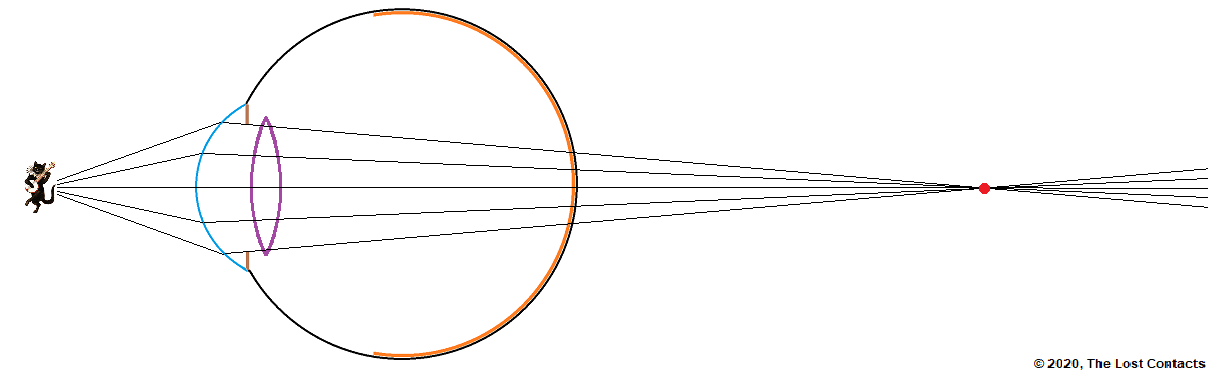
This second eye is looking at an object that is less than 6 meters (20 feet) away – hence the light reaching the eye is divergent.
This results in the focal point forming behind the retina.
This means the vision is blurry.
The eye looking at a near object.
This third eye is looking at an object the very close to the eye – hence the light reaching the eye is very divergent.
This results in the focal point being formed even further behind the retina.
This means the vision is very blurry.
The eye looking at a very near object.
Wait… What?
Am I trying to say that anytime we look at something up close the vision is blurry?!
If you are an emmetrope (you don’t wear glasses), you know that’s not true. You can see well in the distance just as well as you can see up close, right? But how can that be if these diagrams are accurate?
Because the crystalline lens is flexible and automatically adjusts its power depending on where you are looking!
This is called accommodation
Yes, let that sink in…
So check it out;
When looking into the distance, the image already falls on the retina, so the crystalline lens can just relax. In this state, it is said to be at rest.
When looking up close, the crystalline lens ‘knows’ that the light entering the eye is divergent, so it becomes more curved in order to increase they eye’s converging power (to offset the incoming diverging light). This keeps the focal point on the retina and the eye sees clearly.
When looking really close, the light entering the eye is very divergent, so the lens becomes extremely curved in order to compensate. Again, by doing so, the focal point remains on the retina and the eye sees clearly.
When the eye is finished looking up close and switches back to looking into the distance, the crystalline lens goes back to being at rest (which means it gets flatter again).
Accommodation
The constant adjustments that the cyrstalline lens makes in order to keep the vision clear is called accommodation.
Speed of Accommodation
Accommodation is very fast. So fast in fact that we’re not even aware that it’s happening. When we change the distance at which we are looking, the cyrstalline lens accommodates to that distance before we have time to notice any blur in the vision.
What Controls Accommodation
Accommodation is all controlled by a muscle that surrounds and suspend the lens in place. This muscle is called the ciliary muscle.
Here is a more in-depth explanation of the mechanism that controls accommodation:
Limits of Accommodation
Accommodation has it’s limits. Generally speaking, the limit is based on age. As we get older, our ability to accommodate gets worse. You can test the limit of your accommodation right now by looking into your palm and moving it closer to your eyes until it becomes blurry. The distance at which you are no longer able to see the details on your palm clearly is the limit of your accommodation.
If you were to measure and record this limit every year, you would find that it gets further and further out every year.
Eventually, accommodation runs out. But more about that in the next lesson!
In Lessons 1-4, we have built up all the knowledge needed to understand the optics and mechanics of how vision works. In this Lesson, I will be putting it all together and you will see that you haven’t been learning all of these things for nothing!
Before you proceed with this lesson, be sure to have read the following lessons:
In Lesson 1, we learned that any object can act as secondary light sources and that the light emitted by these objects is diverging. However, the divergence of the light decreases as it travels away from the source. When the light has traveled a distance 6 meters (20 feet) from the object, it has essentially lost all of its divergence. In other words, the light has become parallel. The distance at which this happens is known as optical infinity.
Remember this?
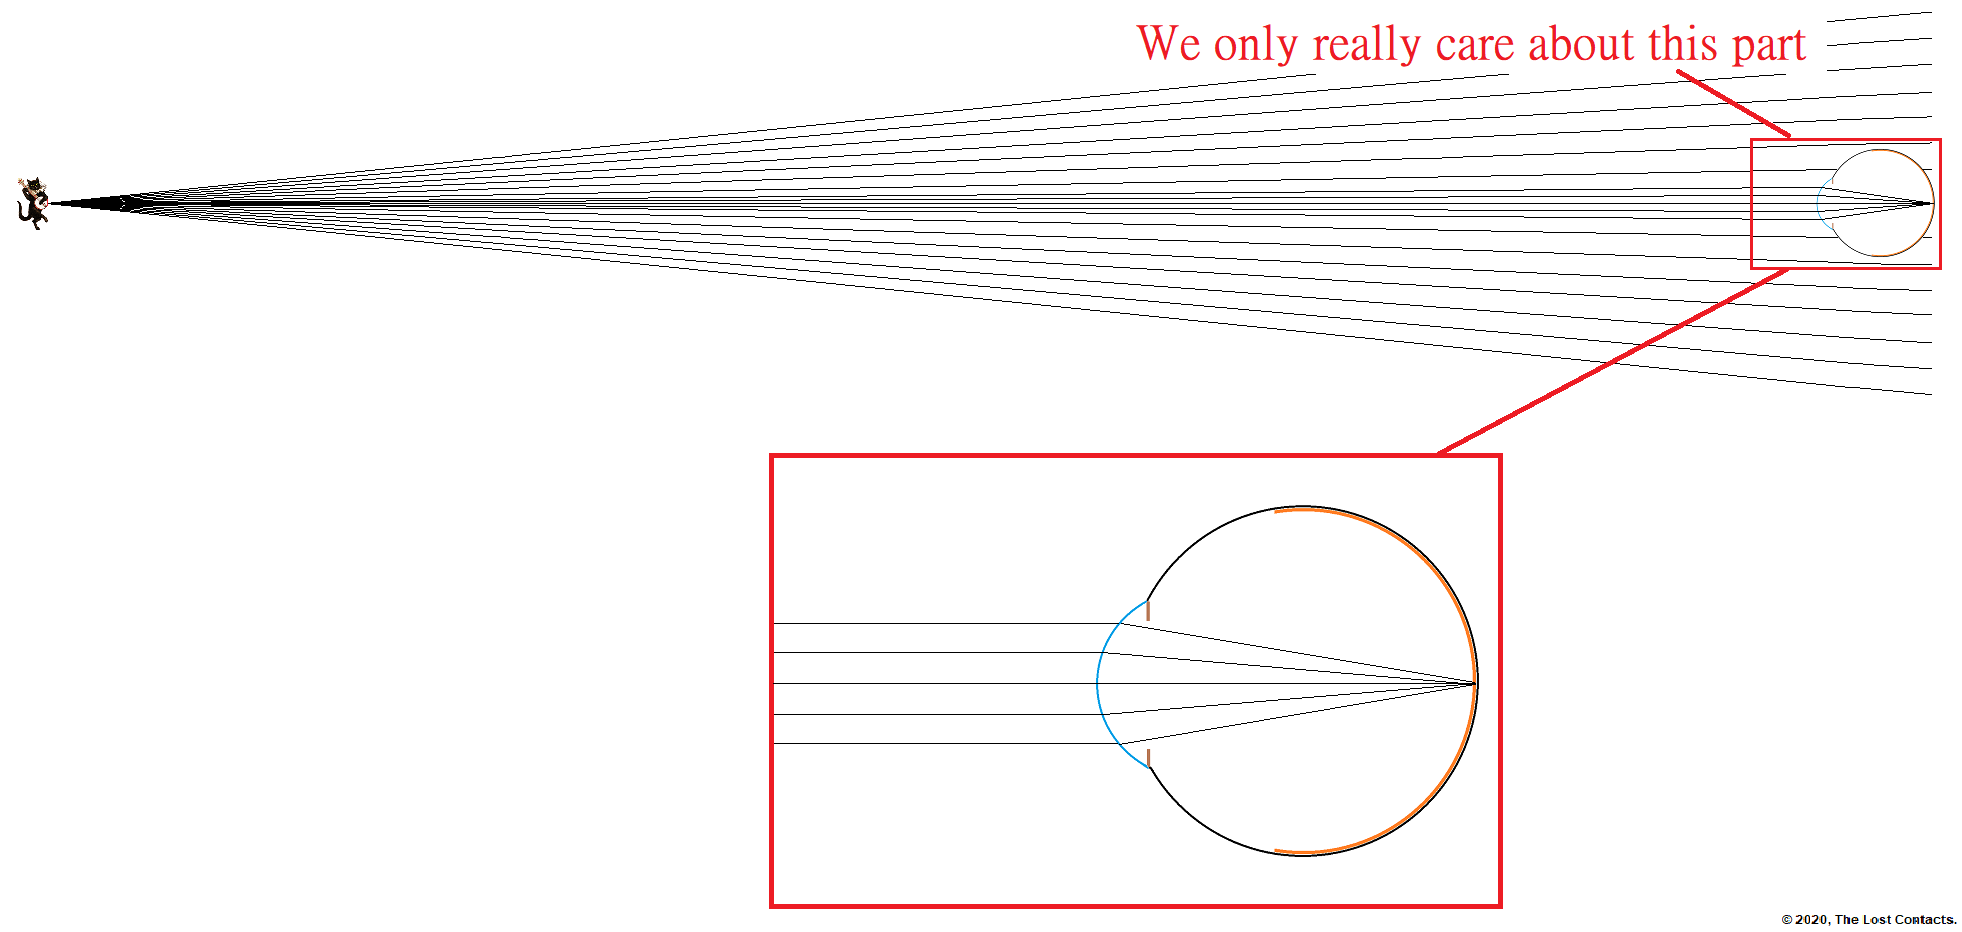
When we draw ray diagrams of the eye, we often want to depict what happens when the eye is looking at objects at optical infinity. However, since we are only interested in what’s happening inside the eye itself, we will omit the object the eye is looking at and simply state that there is an object somewhere at optical infinity and only draw the incoming parallel light rays.
Including the distant object makes our diagrams needless long.
Instead, we only focus on the important part and simply state or assume that there is an object out there at optical infinity.
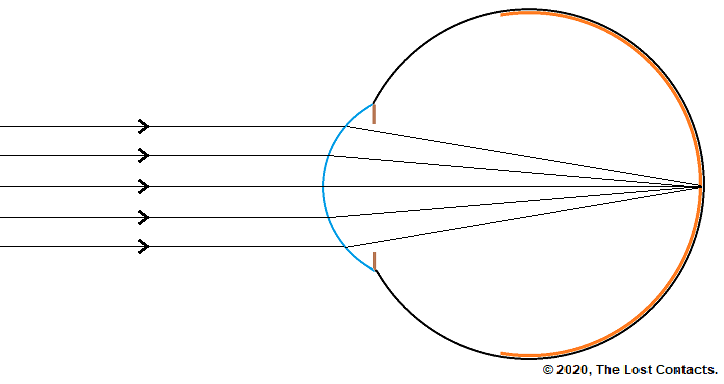
Much cleaner right? This is the type of diagram we are going to be working with from now on, and unless otherwise stated, we will assume that the eye is looking at distant objectssomewhere out in optical infinity.
Ray Diagram of The Eye
Let’s take a closer look at exactly what is happening in this diagram.
The Eye Converges Light
Here we see incoming parallel light rays that pass through the cornea and emerge as converging light rays.
Recall from Lesson 2 that plus (converging) lenses cause incoming parallel light to emerge as converging light.
Recall from Lesson 4 that the cornea is transparent and curved, which we also learned from Lesson 2 means that the cornea acts as a lens.
Therefore, if we combine these two pieces of information we can conclude that the cornea acts as a plus (converging) lens!
The Focal Point & Focal Length
Recall from Lessons 2 & 3 that converging light eventually forms a focal point. The focal point forms a certain distance away from the plus lens (in this case it’s the cornea) depending on the power of that lens. That distance is called the focal distance or focal length.
You may now be wondering what the power of the cornea and its focal length are. I’m sure you are dying to find out!
However, due to reasons that are beyond the scope of this course, we are going to ignore a few technicalities and use a simple, made-up number for the power and the focal distance of the cornea. Don’t worry, this will not affect your understanding of the underlying principles.
Power of the Cornea
So if we use a focal length of 2cm, can you calculate the power of the cornea?
Have you figured it out?
If you’re not sure what to do, consider re-reading Lesson 3 on lens power.
If you calculated that with a focal distance of 2cm, the cornea would be +50D, not only are you correct, but you also remembered to convert from centimeters to meters! Good job!
Calculations:
The focal length is 2cm.
meters = centimeters/100
In meters the focal length is 2/100 = 0.02m
The equation for lens power is:
Lens Power = 1 / Focal Length
Lens Power = 1 / 0.02m = +50D
Note: For simplicity, we will assume the cornea has a power of +50D in this and in future lessons. In reality, the cornea’s power varies from person to person and is usually between +40D and +45D.
Also note: The length of the eye is also not exactly 2cm. For most people, it is around 2.3cm, but again, this varies from person to person.
The Retina & The Focal Point
Notice that in our diagram, the focal point is exactly on the retina. This is when the eyes can see the object they are looking at clearly.
This is extremely important to understand so I will stress it again.
The eyes see clearly when the focal point is exactly on the retina!
If the focal point were not on the retina, but rather in front or behind the retina, it would result in blurry vision.
Example of vision when the focal point is on the retina
Example of vision when the focal point is not on the retina
We will learn more about how and why the focal point may not be exactly on the retina in Lesson 6.
** For now, the important thing to understand is that when the focal point is exactly on the retina, the vision is clear. **
And with that, let’s recap.
Recap
For human eyes, optical infinity is approximately 6 meters or 20 ft. The light that reaches our eyes from objects that are at or beyond optical infinity is always parallel.
The cornea of our eyes, which acts as a plus/converging/convex lens takes that parallel light and causes it to converge.
The converging light comes to a focal point inside the eye.
If the focal point happens to be exactly on the retina, then our eyes can see the objects they are looking at clearly.
If for reasons we will explore in the next lesson, the focal point is not exactly on the retina, vision will be blurry.
Summary
This lesson has combined all of the subject matter we’ve learned from previous lessons. If there is anything thus far that you don’t understand, try going back and re-reading lessons 1-4.
If you understand all of the lectures but still have questions, then it would be my pleasure to answer them. Just leave your question in the comments below!
If you don’t have any questions, then it’s time to move onto Lesson 6!
Most of us think of light as just the opposite of darkness. It’s what illuminates our world and allows us to see. If there’s too much light it hurts our eyes. If there isn’t enough light we can’t see.
Seems simple enough, right? And it is, for the purposes of this course anyway.
I will not be delving into the fascinating nature of light here. However, if you would like to learn more exactly what light is, here are few videos that cover most of the basics.
Helpful Videos
Drawing Light
Being able to represent light in diagrams is extremely useful in learning how different types of lenses work.
Luckily, you don’t have to be an artist to be able to draw light. All you have to do is draw a straight light with an arrow tip that shows the direction the light is taking.
Here’s an example:
This simple diagram represents a single light ray travelling from left to right. When drawing light using lines like this it is called a ray diagram.
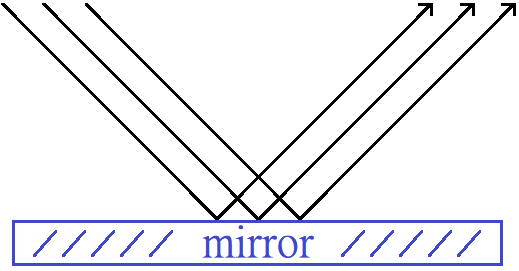
Here is another ray diagram showing several light rays reflecting off a mirror.
Important Take-Home Message #1:
Unless it encounters a different medium, light always travels in a straight line.
Let’s explore this important take-home message in a little more depth.
What is a medium?
A medium refers to any substance through which light can travel. For example, light can travel through outer space, air, water, glass, etc.
Can light change direction?
Yes it can and that will be crucial to our understand of lenses, but for now it’s equally important to understand that so long as light doesn’t encounter a new medium, it does not change direction, i.e., it travels in a straight line.
Light rays do this
Light rays do not do this
Where Does Light Come From?
Primary Light Sources
Se
Light originally comes from primary light sources. A primary light source is anything that generates lights. Here are some common primary light sources:
The Sun
Fire
Light bulbs
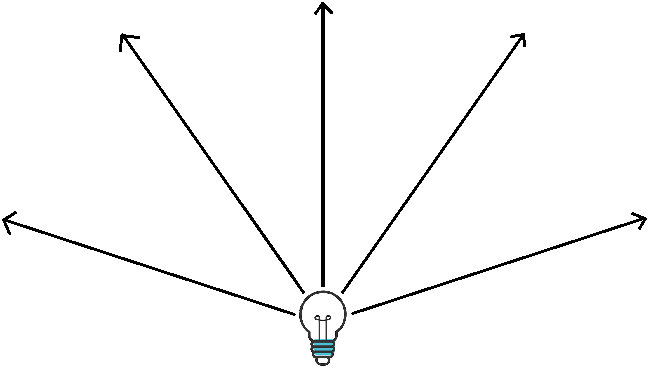
Now let’s incorporate a light source into a ray diagram.
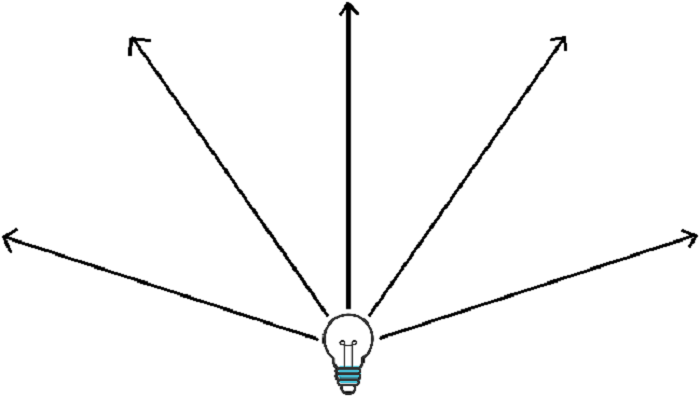
Example of a primary light source.
In this ray diagram, you can see the light source (light bulb) and the light rays being emitted from it in all directions.
Its worth noting that even though I’ve only drawn 5 light rays here, I could have drawn as many or as little as I wanted. Generally speaking, to keep ray diagrams neat and tidy, only a few light rays are included.
Secondary Light Source
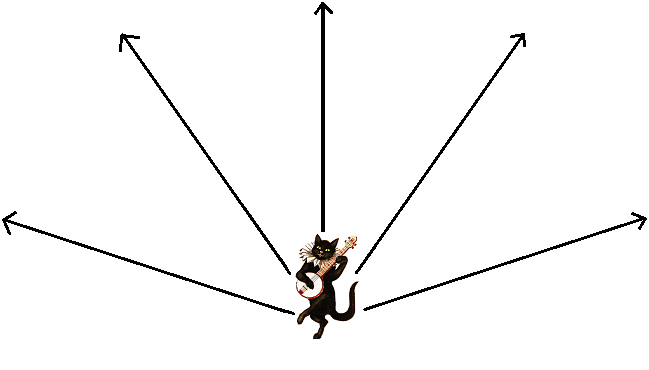
By contrast a secondary light source is anything that reflects light. That reflected light acts like the light emitted from a primary light source.
It may seem arbitrary to define since almost everything can be a secondary light source. Essentially, anything that you can see but does not generate light acts as secondary light source.
Example of a secondary light source.
The difference between primary and secondary light sources is largely pedantic as they both behave in the exact same way as far as the optics of vision is concerned.
Since virtually anything can be a secondary light source, we tend to refer them as objects ray diagrams.
Important Take-Home Message #2:
Anything that we can see acts like a light source (whether it’s a primary or secondary light sources is largely irrelevant).
Introduction to Vergence
If you’ve just been skimming through this lesson so far looking for the right place to start paying attention, this is it!
The concept of light vergence will apply to literally everything else we cover from now on.
Now, if you research ‘light vergence’ on the internet, you’re going to find a lot of technically explanations involving wavefront curvatures and some weird looking equations. Forget all of that!
Here all you (remember that this lesson is intended for non-licensed optometric and optical staff members) need to know.
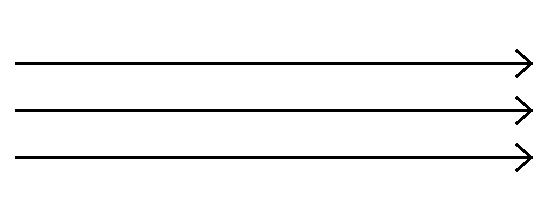
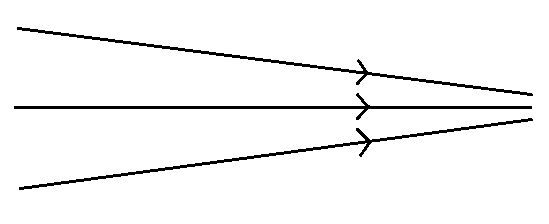
There are 3 vergence states:
Negative Vergence
Zero Vergence
Positive Vergence
Light rays move away from each other.
Light rays travel parallel to each other.
Light rays move towards each other.
Now let’s examine the key points of each types of vergence.
Negative Vergence
When the light rays are travelling away from each other, that light has negative vergence.
When light has negative vergence, each individual light ray gets further and further apart from each other. As such, they will never cross.
Light emitted from any* light source has negative vergence.
Vergence is the most negative at the light source
As light gets further away from the light source is tends towards zero vergence
Light reaches zero vergence at ~20 feet from the light source.
Another name for light with negative vergence is diverging or divergent light.
*Except lasers and other crazy contraptions.
Point number 3 was difficult to explain in words. This diagram will make things more clear.
Click to enlarge
In the above diagram you can see that the object is emitting divergent light. The further the travels away from the object, the less divergent it becomes. At approximately 20 ft (6 m), light rays become parallel.
Take-home about negative vergence:
Light emitted from objects is initially divergent but becomes more parallel as it travels further away.
Zero Vergence
Light rays of light with zero vergence travel parallel to each other.
They never get closer to each other.
They never get further apart.
Another name for light with zero vergence is parallel lightor collimated light.
Positive Vergence
Light rays of light with positive vergence travel toward each other.
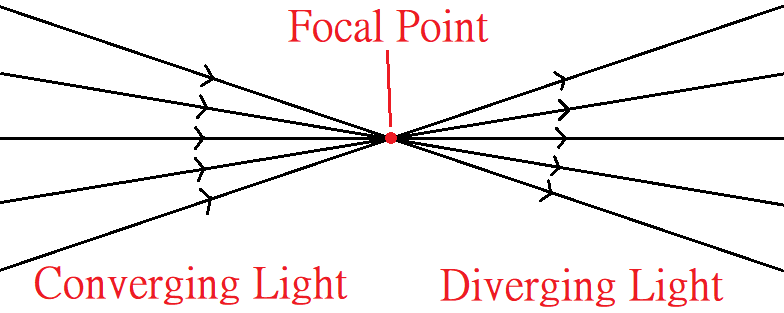
Light rays of converging light eventually all meet at a single point called a focal point.
Light beyond a focal point becomes divergent.
Another name for light with positive vergence is converging or convergent light.
So far you’ve learned that light is divergent when it is emitted from a light source (whether primary or secondary) and that it becomes parallel when it reaches a certain distance from the source.
You may then be asking… how does light become convergent?
That is a great question! We will be tackling that very topic in the next lesson!







 The focal length is 2cm.